Description
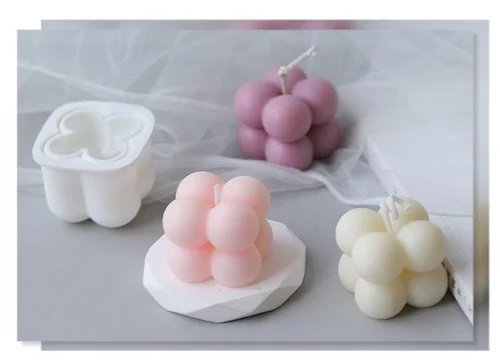
A mini candle bubble silicone mold is a fun and versatile tool for creating unique candle shapes. Here’s how to use it:
1. **Gather Materials**: You’ll need wax (soy, paraffin, or beeswax), a wick, a heat source, a thermometer, and your silicone mold.
2. **Prepare the Wax**: Melt the wax in a double boiler. Monitor the temperature—most waxes should be heated to around 170-180°F (77-82°C).
3. **Add Color and Fragrance**: Once melted, you can mix in dye and fragrance oils, if desired.
4. **Attach the Wick**: Secure the wick in the center of the mold. You can use a wick holder or a dab of melted wax to keep it in place.
5. **Pour the Wax**: Carefully pour the melted wax into the mold, filling it to the top. Allow a little space if you plan to add more layers or textures.
6. **Cool Down**: Let the candle cool completely, which may take several hours.
7. **Demold**: Once fully cooled, gently pull the candle out of the silicone mold. Silicone makes it easier to remove without damage.
8. **Trim the Wick**: Cut the wick to about 1/4 inch above the candle surface.
9. **Enjoy**: Your mini bubble candle is ready to use or gift!
These molds allow for creative designs, so feel free to experiment with different colors and layering techniques!


Reviews
There are no reviews yet.